Chapter 5
INSPECTION
1. Starting at the lower surface of the canopy, check the
line attachment loops and their associated bar tacks.
Follow the line downward to the cascade junction, if
applicable, and check the bar tack at this location.
Continue down the line to the connector links and check
the bottom loop and bar tack.
2. Starting at the top and working your way downward,
inspect the steering lines. Check all junctions and bar
tacks, paying particular attention to the brake loops.
Check the security of the steering toggles to ensure the
correct attachment method is followed. If the toggles are
improperly tied, they may come off when the jumper
deploys the brakes. Make sure the toggle matches the
size of the brake loops. If they are too large, they may
hang up and not release when needed. For compatibility,
the toggles should be those supplied with the harness
and container.
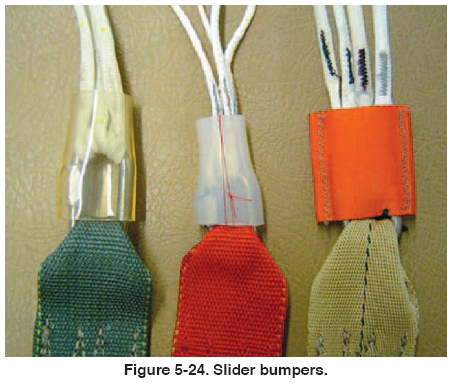
3. If Rapide® links are used on the canopy, check them as
set forth in the section on round canopies. The link orientation
and tightness will be the same. Some canopy manufacturers
provide and prescribe the use of “slider
bumpers” with their canopies. These are made from either
webbing or from vinyl or rubber tubing and are designed
to protect the grommets of the slider from impacting the
connector links during deployment. If these bumpers are
used, it is recommended that they be tacked in such a
manner that they cannot slide up the lines and interfere
with the slider during deployment. [Figure 5-24]
4. A new type of connector link, called the “soft link,”
has been approved for use with certain reserve canopies.
[Figure 5-25] Manufactured from Spectra® line, they
loop through the bottom of the suspension line and the
end of the reserve riser. The strength of these soft links
far exceeds that of the metal links when installed properly.
If installed on the reserve, the rigger should have
the manufacturer’s instructions to ensure the correct
installation.

HARNESS
1. When inspecting the harness, start at the riser end,
checking the condition of the webbing and stitching. Pay
particular attention to the security of the steering line
guide rings and the method of stowing the excess steering
line. If these guide rings fail, it can result in fatal consequences
to the user.
2. Check all of the hardware on the harness in the same
manner detailed in the pilot emergency parachute section
in this chapter (page 5-5).
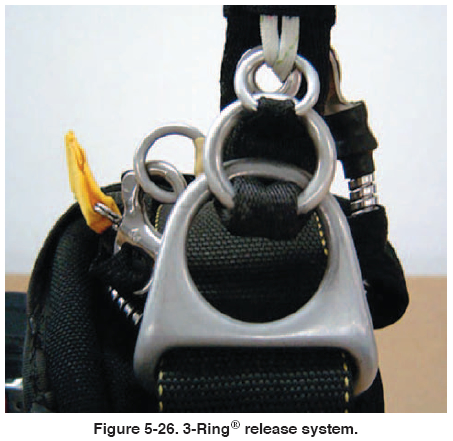
3. Check the canopy release system for wear and operation.
The release in almost universal use today is the 3-Ring®
release system. [Figure 5-26] With this system, it is
imperative that the rigger also checks the release cable
housings for security and cleanliness. Without proper
maintenance, this system can be subject to hard pull
forces and the inability to release properly. Since the successful
operation of the reserve deployment is somewhat
dependent on cleanly releasing the main, a properly operating
release system is necessary. The primary areas for
inspection are the release locator Velcro® on the harness
and the cable housings. Check the housing ends for sharp
edges on the inside of the grommets. If the housings are
tacked to the harness, make sure these are secure. If the
customer did not bring the main canopy with the reserve,
the rigger should encourage the customer to at least bring
the 3-Ring® release handle in for inspection and service.
| 
