The Final
Phase
by H. Dean Chamberlain
|
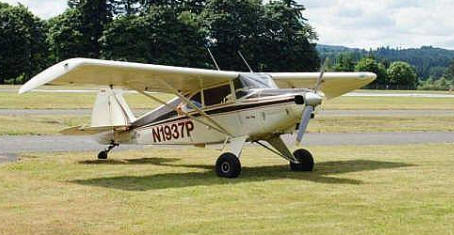
It finally happened. The Orphan flew on June 28, 2003. It may not rank up there with that other ’03 history making flight of a hundred years ago, but for me, it was historical. For those not familiar with the Orphan, it is my name for my old, 1953 vintage, Piper PA-22-135 Tripacer that went in for an annual inspection in January 2000 and finally flew again this year. The takeoff was touch and go for a moment. Although no pun was intended, the take off was touch and go because of the security requirements that had to be complied with in flying out of one of the airports in the Washington DC Flight Restricted Zone (FRZ). The person responsible for all of the work and the many upgrades done on the Orphan and who signed off the three and a half year “annual” wanted to fly the aircraft overhead in the local traffic pattern for at least 30 minutes to check the engine and all of the other work done on the aircraft. |
|
The problem was
although he had completed the required security checks and had his special codes
to fly out of the airfield, he could not get permission to do the test flight in
the traffic pattern so he could remain within gliding distance of the field in case the
aircraft had a problem. Rather than wait until the following Monday to fax
a written
request to the Transportation Security Administration, he chose to fly
to a nearby airport that was out of the FRZ, but still within the
Washington area Air Defense Identification Zone (ADIZ), to do the test
flight. After an hour overhead the other airport, he landed. The Orphan
had completed its first flight in more than three years.
As I have discussed in the previous three
articles about the Orphan’s
maintenance history and major upgrades, the airplane has provided me a
unique learning experience—one that I hopefully will never have to
repeat. More expensive than a graduate degree in aviation, it was an
experience I have tried to share with you over the years. I hope my
lessons learned in buying an old aircraft and having it upgraded will
help you avoid some of the mistakes I made. Trust me—after all, I do
work for the government—it is cheaper to learn from someone else’s
mistakes or adventures than it is to pay for your own lessons. But, I
must admit, not all of my decisions and efforts were mistakes,
expensive, yes; time consuming, yes; but not classic mistakes. I will
also admit, if given the chance to change some of my decisions, I would
change some—but not all.
The decisions I made were the best I could make at the time, based upon the information then available. Since I work in Washington DC, based upon recent news reports, some might say it was an intelligence breakdown. Others might question if any intelligence was involved. But, what was done was done of my own free will, and I have the receipts to prove it.
Since I discussed the importance of a thorough pre-purchase inspection, title search, the need for a detailed upgrade budget and completion plan, and the critical importance of not buying warranted items such as avionics and instruments a day earlier than necessary before installation so you can avoid losing any warranty coverage, I lost all of my instrument and avionics warranty protection because of the extended time required to complete the project before the June 28, 2003, flight, I will limit this article to what became the most challenging part of this three-and-a-half year project: the paperwork.
After 20 years in the military and more than 13 years at FAA, I know paperwork. I understand and accept the fact that no aircraft can fly until the weight of its paperwork equals the aircraft’s max gross weight. I would say until the paperwork exceeds its max gross weight, but then that would require more paperwork. But in my opinion, it may take you more time getting the paperwork signed approving whatever upgrades you are doing than in doing the actual work.
In today’s FAA world where the word “customer” is often spoken, I have my own interpretation of that word. Just like I don’t consider myself a “customer” of the Internal Revenue Service—after all, I don’t have a choice in paying taxes—I don’t think of myself as a customer of the FAA. As the Orphan’s owner, I had to have FAA approval for the work done on the airplane. Since I can’t go to the Alternative Aviation Administration for my approvals to fly in the United States, I have learned some important things that might help you complete your project or any dealings with your local Flight Standards District Office.
I understand the meaning of the word customer. I was a customer when I bought all of the parts for the aircraft. I shopped price, availability, and service of the various companies I bought from. For example, one of my most recent purchases was made online using the Internet. After entering the items I wanted, the company’s web site immediately told me the status of each item and if it was in stock. The web site gave me my choice of shipping starting with the least expensive option which took the longest shipping time through the various options to the most expensive shipping method which could deliver my order overnight. I made my decision based upon cost and shipping time. I consider myself thrifty, although some might say I am cheap. Therefore, I chose the lowest cost shipping because it was not worth the extra money to have parts delivered overnight when the person doing the work could only work on the aircraft on Saturdays. After I completed my order, within 10 minutes, I received an e-mail message confirming my order. I felt like a well taken care of customer. I considered myself a customer because I had the freedom of choice. Such is not necessarily the case when dealing with government agencies. And I must admit; I may have been guilty of providing less than prompt service at times in my years of government service. But I digress.
So whether I am an FAA customer in the truest sense of the word or not, I have learned some valuable lessons that will help you when you have to process your paperwork through your local Flight Standards District Office (FSDO). My suggestions might even save you some time or money when dealing with your local friendly aviation authority folks.
The first and most important lesson is that the authorized person or company working on your aircraft must know the FAA’s regulations and procedures. It is equally important to know what the local FSDO likes. Although Flight Standards is constantly trying to standardize its offices and processes across the country, people being people, different offices may interpret the same rules, orders, and procedures differently. The secret is finding out what your local office’s inspectors want and providing it. Before you start any major project, you or the person who is going to do the work should contact the local FSDO airworthiness inspectors you will be working with to review the project and what FAA requirements will have to be met. This effort will save you and the inspectors valuable time at the end of the project whether you are building an aircraft or upgrading one.
Then the certificated or authorized person doing the work must know and understand what paperwork must be submitted for FAA approval or acceptance. Complete and detailed paperwork is always preferable to only providing the bare minimum. In some cases, photographs may be appropriate to help document the work performed.
An important part of any significant repair or upgrade project is reviewing the definition between what is a major or minor repair and what is a major or minor alteration. This is a critical interpretation because it drives the scope of the paperwork involved and the use of approved and acceptable data. These terms are defined in Title 14 Code of Federal Regulations (14 CFR) part 1.
Other important terms include supplemental type certificates (STC), technical standard orders (TSO), parts manufacturer approval (PMA), and FAA approved parts. Many of these terms are defined in (14 CFR) part 21, Certification Procedures for Products and Parts; and part 43, Maintenance, Preventive Maintenance, Rebuilding, and Alteration. Part 43 is vital because it defines what are repairs and alterations, who can do what work on an aircraft, and what record keeping is required. It also discusses the types of documentation you have to submit.
Depending upon your project, FAA form 337, Major Repair and Alteration (Airframe, Powerplant, Propeller, or Appliance), will become one of the most important forms in the life of your aircraft. This is the document most of your work will be reported on. Conversely, when you buy an aircraft, you should look for any filed FAA form 337s which might document work done on your aircraft. Completed FAA Form 337s must be filed with the FAA’s Civil Aviation Registry in Oklahoma City, OK. Submitted 337s become a permanent part of your aircraft’s official records.
You may want to do a detailed review of your prospective aircraft’s records to check for the type of work performed on the aircraft, any damage history, and to ensure work done on the aircraft is properly documented.
Aircraft files are a matter of public record in Oklahoma City. You can visit the office and inspect your records or you can contract with a company to review your aircraft’s records and provide you a report about them. This is a case where I think paying someone who does this type of work daily and knows what to look for is worth the money. This type of record search is critical for reviewing an aircraft’s title before purchase to discover any recorded, unreleased liens against the title. A clear title is one of the most important documents you can have when buying an aircraft. You don’t want the problems of trying to resolve the status of a 20-year old lien that still shows up in the aircraft’s records.
For a history of any reported damage or any changes in your prospective aircraft, you can contact the Registry for a copy of the aircraft’s file. You will receive a microfilm copy of your aircraft’s records. My file showed the ownership history of the Orphan from the day it left Piper Aircraft’s factory until the day I bought it. The file included the list of owners, changes in registration, security documents for the various aircraft loans used to finance the aircraft, filed liens, removed liens, and recorded 337s were all there. The operative word here is paperwork filed with the FAA.
No discussion about a major upgrade or maintenance project would be complete without reminding you to review the various FAA advisory circulars, orders, and regulations concerning your project. Just like some aircraft owners and mechanics will try to “hide” work done on an aircraft by, in my words, “omission of details” in the aircraft’s records, some may try and minimize work or documentation by not getting the correct FAA approvals. One of the most important roles the FAA serves is the one it plays in the maintenance of safe aircraft. Just like a homebuyer who expects to buy a “sound” house by depending upon the local building codes, building inspectors, and appraisers to ensure the house meets minimum construction standards, aircraft buyers need to be able to depend upon the quality of the work done on an aircraft and the documentation of that work to ensure the safety and value of that aircraft. One of FAA’s most important roles is to ensure that what you buy, whether it is an aircraft, appliance, or other aviation part meets appropriate maintenance and safety standards and that the people doing the work are properly trained and qualified. FAA’s oversight of both aircraft certification and maintenance is your best protection both in the air and financially.
As a general reminder, for an aircraft to be considered airworthy, it must meet two conditions. According to FAA Order 8130.2E, Airworthiness Certification of Aircraft and Related Products, it says based upon case law an aircraft must conform to its type certificate (TC). According to the order, conformity to type design is considered attained when the aircraft configuration and the components installed are consistent with the drawing, specifications, and other data that are part of the TC, which includes any supplemental type certificate (STC) and field approved alterations incorporated into the aircraft.
The second condition is that the aircraft must be in condition for safe operation. The order says, “This refers to the condition of the aircraft relative to wear and deterioration, for example, skin corrosion, window delamination/crazing, fluid leaks, and tire wear.”
Based upon the above two conditions, it is important that any aircraft you might be thinking about buying meets its TC data sheet (TCDS) or its TCDS as properly modified. Properly modified and documented are the operative words.
If you are thinking about buying an old aircraft such as my 50-year old Tripacer, in those 50 years, you can expect many mechanics have worked on the aircraft, and that they used many parts to maintain the aircraft’s airworthiness. The question is does the aircraft still meet it TCDS or its properly modified TCDS. For those not familiar with an aircraft’s TCDS, each FAA-approved aircraft’s manufacturer lists on the aircraft type certificate data sheet for a given make and model all of the approved equipment installed on the aircraft or approved for use on the aircraft at the time of manufacture. Available through the FAA’s Internet web site, an aircraft’s TCDS also lists the aircraft’s approval basis, its performance data, and its equipment. For example, the TCDS may list one or more propellers approved for the aircraft. If the aircraft you are interested in buying does not have one of the approved propeller models of the proper size installed, then you have a potential problem. The aircraft does not meet its TCDS unless the change has been properly done in accordance with FAA regulations. If the change was not done properly, the aircraft is not airworthy. If you cannot find an appropriate maintenance record and FAA documents that approved the installation of the non-TCDS listed propeller, you will either have to replace the propeller with the correct one or do the necessary work to try and get the installed non-TCDS listed propeller approved by the FAA. Either option could be expensive and time consuming.
This is why a careful pre-purchase aircraft inspection by a qualified and knowledgeable (specific make and model) FAA-certificated mechanic includes checking all installed components against the aircraft’s TCDS. If an installed item is not listed, then there must be FAA documentation approving the installation. Otherwise, you may be buying an expensive problem without realizing it. This is why it is critical that an annual inspection or pre-purchase inspection be detailed enough to check on installed components by manufacturer, make, and part number to protect both your safety and the value of your aircraft or potential aircraft. An installed component list by manufacturer and serial number also helps resolve the applicability issue of any FAA airworthiness directives for a given make or model of aircraft or component.
Only through proper documentation and maintenance can you be assured that your aircraft meets its designed safety standards and requirements. As a potential aircraft buyer, you need to be able to make informed choices about the aircraft you are interested in buying. As I said earlier, to me, being a customer means the freedom of choice. With that freedom is the freedom to make bad choices. Your job as an intelligent aircraft buyer is to know and understand the nuances of how to buy an aircraft.
Sad to say, there are aircraft out there that are not what their owners represent them to be. Your job is to identify those type aircraft before you purchase one. Am I saying not to buy such an aircraft? No, I am saying if you buy such an aircraft, the cost of that aircraft should be discounted to make up for the expense and trouble required to make it meet its TCDS or properly modified TCDS to be airworthy.
The importance of proper documentation can’t be stressed enough. In the case of the Orphan, eight FAA form 337s were submitted to the local FSDO. One, because it involved a fuel line modification was forwarded by the FSDO to the New York Aircraft Certification Office (ACO) for review. The FSDO decided to have the ACO review the 337 rather than doing a field approval at the FSDO level.
In checking on the status of the review, I called the ACO and interviewed Mike Muratore about my 337 and what people can do to expedite their paperwork through an ACO review process. Mike is a flight test engineer. He said the ACO’s greatest problem is incomplete paperwork. According to him, the engineers at the ACO don’t do engineering work on the submitted packages. He said his job is to make sure that the submitted paperwork meets the appropriate rules. One way people can speed up the review process, he said, is by validating their paperwork by stating why they think what they are submitting meets the appropriate rule.
He said another thing people should do is make sure all of the required tests are done and documented for a particular project. For example, in reviewing a complex electrical or electronic submission, he said he would check if the applicant provided data on any interference testing done. He would also check if the applicant provided details of a completed test plan that met the regulatory requirements. Since failure to provide complete documentation can delay any FAA approval, it is important that anyone submitting an approval package review the appropriate rules, advisory circulars, and other information or guidelines on the repair or alteration before submitting the documentation. This will reduce the chance the documentation is returned to you for more work. You need to take the time to ensure the required data and documented work completed was done in accordance with FAA requirements and properly submitted to the FSDO or ACO. This is why working with a maintenance person who knows how to do the required work and how to submit the proper paperwork for completed work is so important in getting an aircraft back in the air.
Mike said his office tries to provide a two-week turn-around when checking properly submitted paperwork.
When asked what other ways someone can expedite a project, Mike said people should check if there are any STCs or other previously approved procedures that would expedite getting an aircraft back into the air without requiring an ACO review. This is why knowing and understanding the regulatory requirements for making repairs and alterations is so important.
In the case of the Orphan, the person doing the work has a good working relationship with the local FSDO, and he is great at detailing and documenting the work accomplished. The eight 337s were approved or accepted, the appropriate aircraft logbook entries made, a revised aircraft flight manual was completed with all of the required supplements and special instructions for continued airworthiness listed, and the Orphan was legal to depart Hyde Field in Clinton, Maryland.
But remember this article is about paperwork and flying. Departing Hyde Field was easier said than done. In the case of the Orphan, because the work was done at one of the three civil airfields within the special Washington Flight Restricted Zone (FRZ), the FAA certificated person who did the work and oversaw the project had to go through his own paper drill. In his case, although he has ramp access at Dulles International airport in nearby Virginia, he had to go through another detailed security check including fingerprinting, another background check, and an FAA pilot records review before he could get authorization to fly the Orphan out of Hyde Field.
Since this is an article about paperwork, this person’s (he requested his name not be used in the article) request for a clearance was initially denied by the FSDO. One of the requirements for the clearance was a current medical. During the course of his background check, the FSDO inspector reviewing the person’s FAA file discovered an expired medical listing. Since the person had had a recent FAA medical examination, he discovered his aviation medical examiner (AME) had failed to send the person’s medical results to the FAA in Oklahoma City. This took additional time and effort to get the medical results forwarded to Oklahoma City. The good news is this case resulted in a FAA Aviation News article reminding pilots to verify their medicals have been properly processed and forwarded to the FAA in Oklahoma City. The article was later reprinted in the Federal Air Surgeon’s Medical Bulletin to remind AMEs to process their paperwork in a timely manner. In this case, it was better the person discovered his doctor had not sent his medical to the FAA as part of the security background check, than during an accident investigation.
As the old saying goes, no job is complete until all the paperwork is done. In the case of an aircraft project, those words are very true. But if you understand the FAA’s paperwork requirements and document your work throughout the project in accordance with FAA requirements, you can wrap up your project and take that first flight with little or no unnecessary delay. But before that first flight, you need to make sure your own paperwork is current. Is your medical, if required, current? Is your flight review and appropriate pilot in command (PIC) requirements current, if you are going to be PIC on that first flight? If it has been a while since you last flew your aircraft, you might want to get checked out in a similar type aircraft to regain your currency in make and model. If you have had an extensive upgrade or a major repair project, you might want to review the FAA’s advisory circular, AC 90-89A, Amateur-Built Aircraft and Ultralight Flight Testing Handbook. The 99-page handbook provides some great safety ideas to help make that first flight a safe one. It is available on the FAA’s web site.
Thanks for listening to the Orphan’s story. It has been an interesting experience for me, and I hope it has provided each of you some insight in the purchasing and upgrading of an aircraft and lessons learned. See you at the airport.
The Orphan is ugly. There is no other way to describe it. The old, multi-colored, fabric aircraft needs to be repainted. With almost all-new sheet metal on it, from prop spinner to engine cowlings to fairings to fuel tank covers, each a little different color, the aircraft is simply ugly. All of its parts and fabric needs to match at least one color, any color, but everything should match. But repainting an aircraft raises an interesting question.
What size should its registration markings be? Title 14 Code of Federal Regulations (14 CFR) Part 45, Identification and Registration Marking, provides the answer. Part 45 describes how aircraft, engines, propellers, certain parts, and U.S. aircraft must be marked.
Subpart C, Nationality and Registration Marks, of part 45, then explains how U.S. aircraft must be marked. There are different rules for different types of aircraft. As everyone knows, the Roman capital letter “N” is the nationality marking for U.S. registered aircraft. 14 CFR part 47 specifies how the “N” number is comprised while part 45 tells how and where to mark it on the aircraft. According to section 47.15(b), the number may not exceed five symbols in addition to the prefix letter “N”. The letters “I” and “O” may not be used. The symbol may be all numbers, one to four numbers and one suffix letter, or one to three numbers and two suffix letters. The first zero in a number must be preceded by at least one of the numbers 1 though 9.
Part 47 then goes into great detail how to register an aircraft with the FAA.
Now that you know where to find the information on how to register an aircraft, and you have your “N” number, whether issued by FAA or a special requested “N” number from FAA, the fun starts with how are you going to mark your aircraft. Since the Orphan is a fix-winged aircraft, we will use it as our example.
But first, aircraft manufactured today or repainted today with certain exceptions must have 12-inch high registration marks. To help everyone comply with the current requirements, part 45, Subpart C, Nationality and Registration Marks goes into great detail about how to mark your U.S. registered aircraft. From section 45.21, General, through section 45.33, Sale of aircraft: removal of marks, Subpart C provides a wealth of information about how to mark your U.S. registered aircraft.
From how to display marks, section 45.23, to location of marks on fixed and non-fixed wing aircraft, sections 45.25 and 45.27 respectively, to the size of marks and what you can do if your aircraft doesn’t have the space necessary to comply with the size of the marks required, section 45.29, to the following special rules for certain types of aircraft, you should be able to answer most of your questions about registration marks in Subpart C. For those unique questions you cannot answer in Subpart C, you should contact your local FAA Aircraft Certification Office.
Although the standard registration mark is 12-inches in height using Roman letters as appropriate, Part 45 has special rules for certain aircraft. Section 45.22, Exhibition, antique, and other aircraft: Special rules, outlines those special rules. They include:
(a) When display of aircraft nationality and registration marks in accordance with Sections 45.21 and 45.23 through 45.33 would be inconsistent with exhibition of that aircraft, a U.S.-registered aircraft may be operated without displaying those marks anywhere on the aircraft if:
It is operated for the purpose of exhibition, including a motion picture or television production, or an air show;
Except for practice and test fights necessary for exhibition purposes, it is operated only at the location of the exhibition, between the exhibition locations, and between those locations and the base of operations of the aircraft; and
For each flight in the United States:
It is operated with the prior approval of the Flight Standards District Office, in the case of a flight within the lateral boundaries of the surface areas of Class B, Class C, Class D, or Class E airspace designated for the takeoff airport, or within 4.4 nautical miles of that airport if it is within Class G airspace; or
It is operated under a flight plan filed under either Section 91.153 or Section 91.169 of this chapter describing the marks it displays, in the case of any other flight.
(b) A small U.S.-registered aircraft built at least 30 years ago or a U.S.-registered aircraft for which an experimental certificate has been issued under Section 21.191(d) or 21.191(g) for operation as an exhibition aircraft or as an amateur-built aircraft and which has the same external configuration as an aircraft built at least 30 years ago may be operated without displaying marks in accordance with Sections 45.21 and 45.23 through 45.33 if:
It displays in accordance with Section 45.21(c) marks at least 2 inches high on each side of the fuselage or vertical tail surface consisting of the Roman capital letter “N” followed by:
The U.S. registration number of the aircraft; or
The symbol appropriate to the airworthiness certificate of the aircraft (“C”, standard; “R”, restricted; “L”, limited; or “X”, experimental) followed by the U.S. registration number of the aircraft; and
It displays no other mark that begins with the letter “N” anywhere on the aircraft, unless it is the same mark that is displayed under paragraph (b)(1) of this section.
(c) No person may operate an aircraft under paragraph (a) or (b) of this section—
In an ADIZ or DEWIZ described in Part 99 of this chapter unless it temporarily bears marks in accordance with Sections 45.21 and 45.23 through 45.33;
In a foreign country unless that country consents to that operation; or
In any operation conducted under Part 121, 133, 135, or 137 of this chapter.
(d) If, due to the configuration of an aircraft, it is impossible for a person to mark it in accordance with Sections 45.21 and 45.23 through 45.33, he may apply to the Administrator for a different marking procedure.
Section 45.25, Location of marks on fixed-wing aircraft, then describes how U.S. registration markings for fixed-wing aircraft are to be located on an airplane. The regulation says:
(a) The operator of a fixed-wing aircraft shall display the required marks on either the vertical tail surfaces or the sides of the fuselage, except as provided in Section 45.29(f).
(b) The marks required by paragraph (a) of this section shall be displayed as follows:
If displayed on the vertical tail surfaces, horizontally on both surfaces, horizontally on both surfaces of a single vertical tail or on the outer surfaces of a multivertical tail. However, on aircraft on which marks at least three inches high may be displayed in accordance with Section 45.29(b)(1), the marks may be displayed vertically on the vertical tail surfaces.
If displayed on the fuselage surfaces, horizontally on both sides of the fuselage between the trailing edge of the wing and the leading edge of the horizontal stabilizer. However, if engine pods or other appurtenances are located in this area and are an integral part of the fuselage side surfaces, the operator may place the marks on those pods or appurtenances.
Although these sections provide a brief overview of the registration marking requirements for U.S. registered aircraft, my recommendation is if you have any questions about your aircraft’s registration marks is to check with your local Aircraft Certification Office or Flight Standards District Office for advice. Painting or repainting your aircraft is a time consuming and potentially expensive project if you are paying someone to do it for you. When painting your aircraft, if it is a fabric-covered aircraft like the Orphan, you need to remember to follow the fabric and paint manufacturers’ recommendations to ensure compatibility between the type of fabric and the type of paint. Then as section 45.21(c)(1) states in part, “Except as provided in paragraph (d) of this section, be painted on the aircraft or affixed by any other means insuring a similar degree of permanence: (2) Have no ornamentation: (3) Contrast in color with the background; and (4) Be legible.
Now you know what type and size of marks you must use, where you must place them, and now how to paint or affix them to the aircraft, you are ready to paint or repaint your aircraft.
But before you rush off with your spray gun to start painting your aircraft, I would like to offer one final thought about painting. One of the inspectors who reviewed this article told me the story about a pilot who had a special graphic painted on her aircraft. When the woman later tried to sell the aircraft, no one was willing to buy the aircraft until she reduced her asking price enough to offset the cost of repainting the aircraft. So if you plan on repainting your aircraft, you may want to consider the future resale value of the aircraft with your new paint scheme as well as does its registration markings comply with the regulations.
Happy flying.
| ?AvStop Online Magazine Contact Us Return Home |